
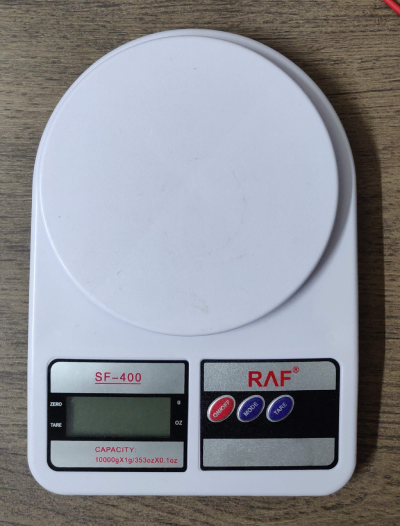
For the past couple of months, I have been frequently logging my meals on HealthifyMe to track my caloric goals. It is a great tool to ensure that you are having a well-balanced diet.
However, it gets a little tiresome to open the app and keep logging the same items over and over with a few adjustments in quantity. To ease my pain, I decided to build a system that would automatically log my meals when kept on the weighing machine.
This machine uses an image classifier to identify the foods kept on it and logs them within HealthifyMe. To implement this machine, we would require the following items:
Hardware Requirements:
Prerequisites
- Basic operating knowledge of Raspberry Pi
- Soldering skill
- Experience in working with hardware modules
- Experience with Python Programming
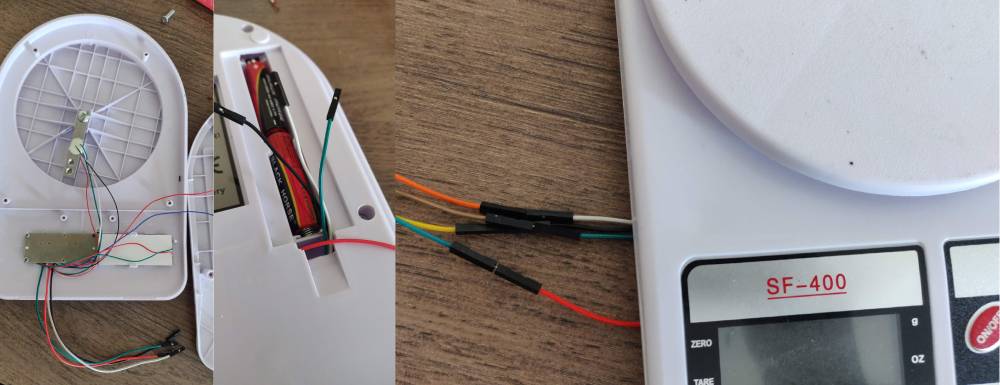
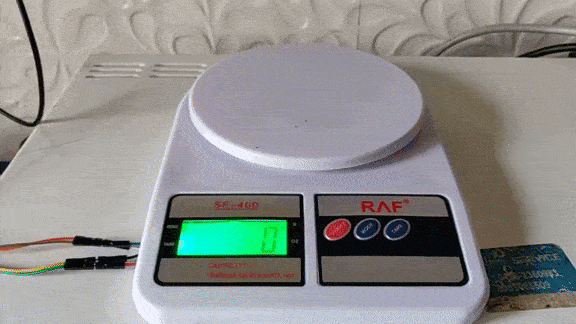
Setting up the weighing machine
Our first task is to fetch the measurement values from our weighing machine. To do this we will open our weighing machine and solder some Jumper cables to our load sensor.
Open the weighing machine by unscrewing the bolts on the rear. Within you should notice the LCD display and the PCB attached to the front panel at the bottom. Notice the four wires (black, red, white, green) that are connected from the load sensor to the PCB. We need to attach our jumper cables to these wires.
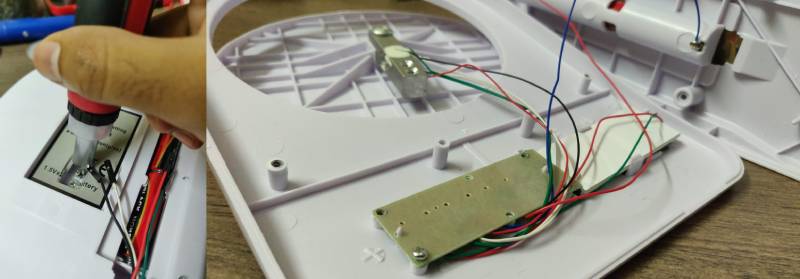
Detach the PCB from the front panel. At the bottom, you should notice the four wires from the load cell being attached to the PCB. We shall solder our jumper cables over here.
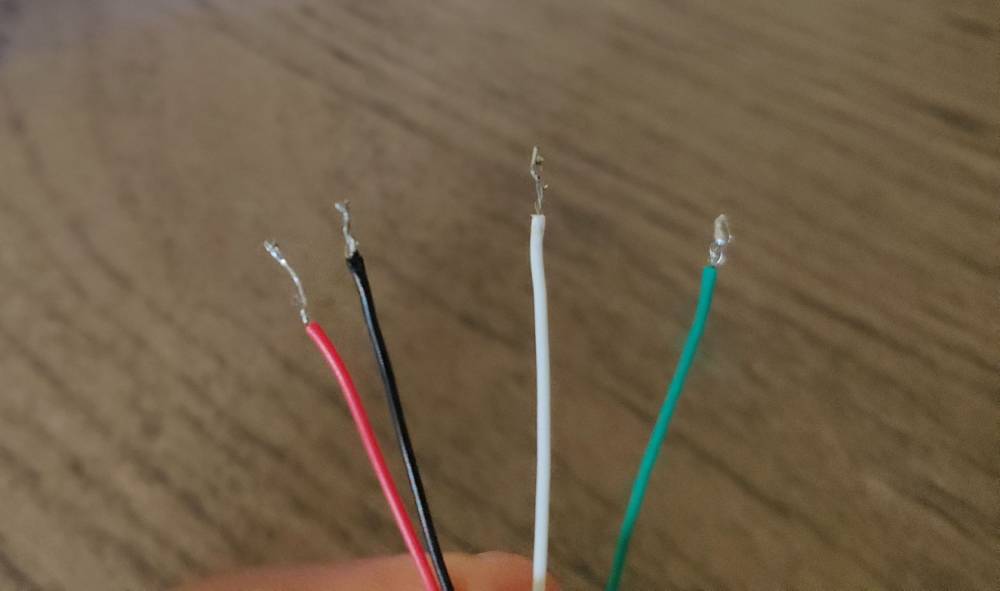
Open the ends of 4 jumper cables using a wire cutter as shown below. I have used the same color coding for the wires as the ones attached to the load sensor. This will come in handy later when we attach them to the HX711 module.
Solder the ends of these wires to the existing connections as shown in the image below.
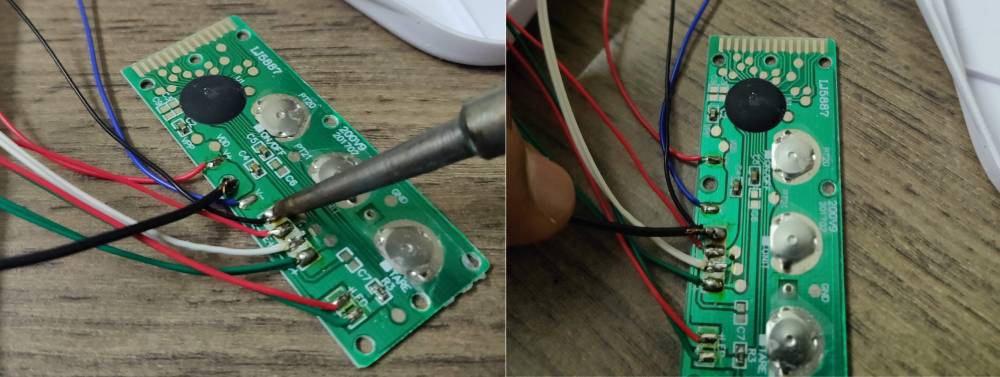
Once soldered, attach the PCB back to the front panel and pass the jumper cables out via the battery panel. Screw the back panel back to the front panel and close the machine as shown in the image below.
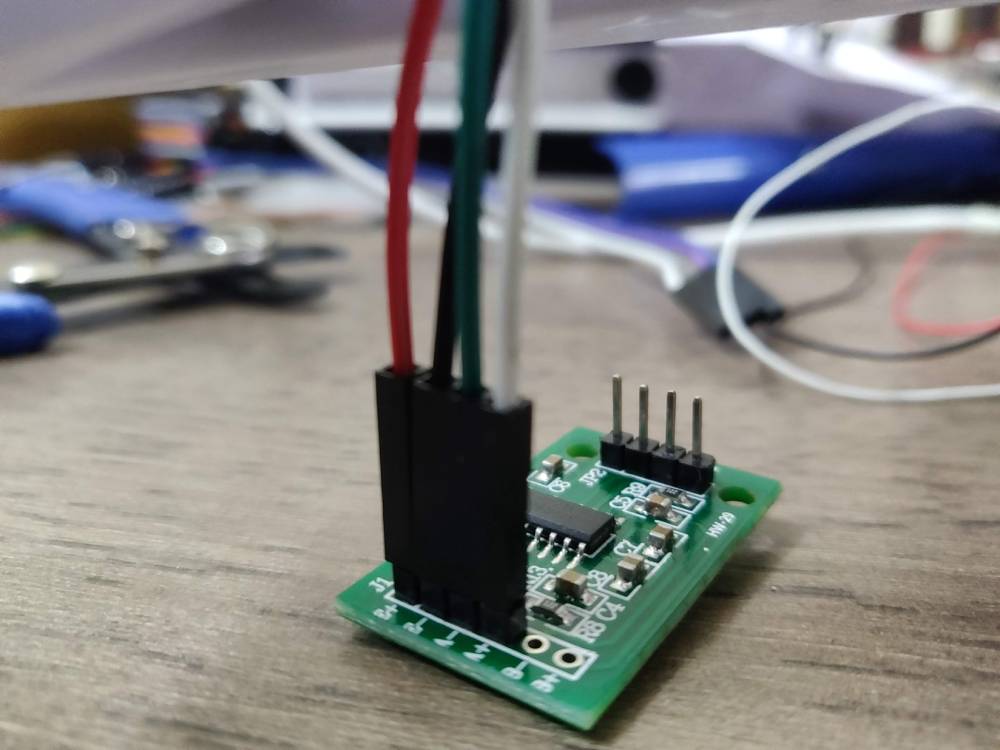
Setting up the HX711 module
Our next step involves fetching the load sensor values within the Raspberry Pi via the HX711 module. The HX711 module is an ADC converter that converts analog signals to digital signals. We need to use this module as an interface to interpret the signals from the load sensor.
Connect the hx711 module to the raspberry pi in the following manner.
| Load Cell | HX711 Module |
|---|---|
| Red Wire | E+ |
| Black Wire | E- |
| Green Wire | A+ |
| White wire | A- |
If your HX711 module does not have header pins, you can solder it directly to the slots present. However, I would recommend soldering the header pins to the module and using female port connectors to easily attach/detach to/from the module as shown below.
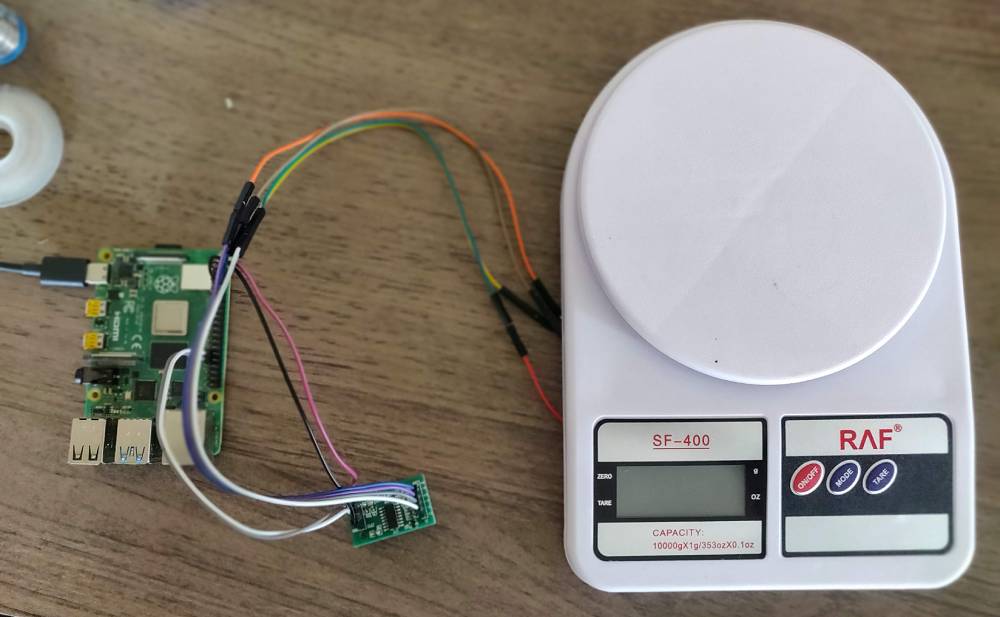
Now connect the HX711 module to your Raspberry Pi as shown below.
| HX711 Module | Raspberry Pi |
|---|---|
| GND | Pin 6 (GND) |
| DT | Pin 31 (GPIO 6) |
| SCK | Pin 29 (GPIO 5) |
| VCC | Pin 2 (5V) |


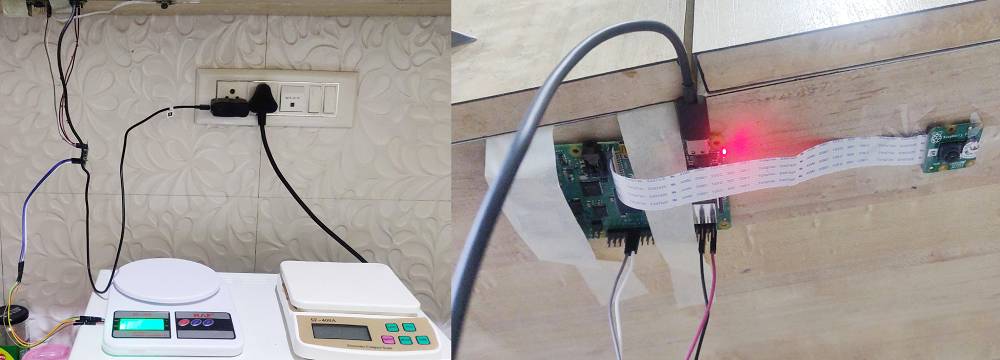
Your final setup should look something like this with the HX711 module and Raspberry PI connected.
Setting up the camera
To log our meals we need to identify the meal we are having. We will do this using a camera to capture images and passing it to an image classifier within our raspberry. Let's go on and set up a camera to fetch images.
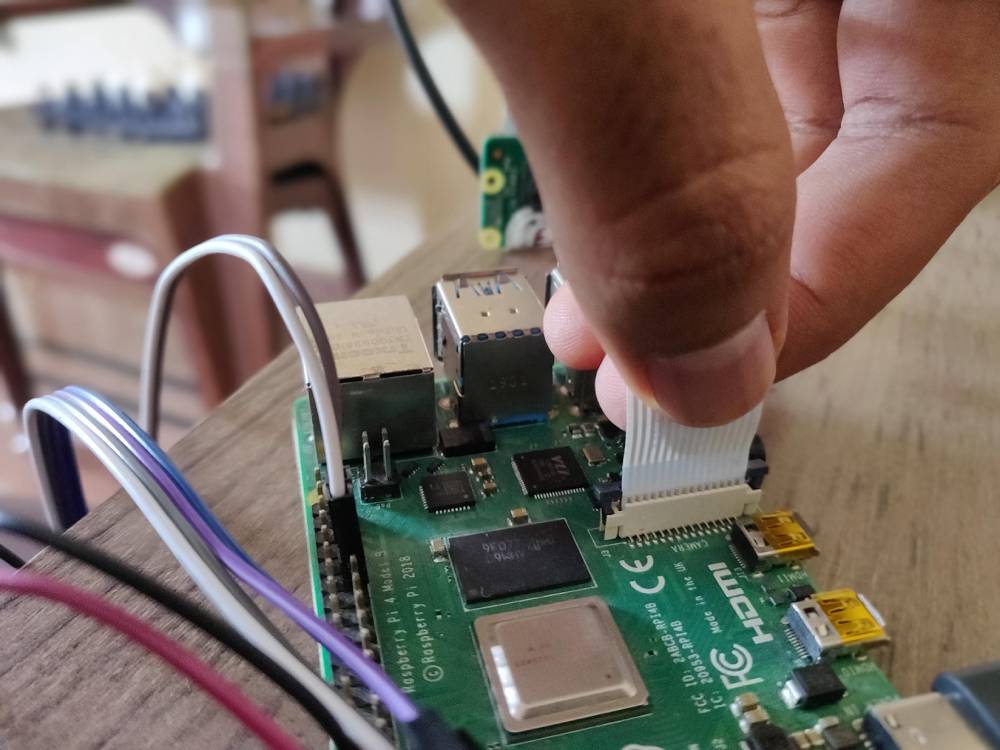
Connect your pi camera to your raspberry pi as shown in the image below and follow the guide here.
You can test your camera using the raspistill command. If the camera is connected properly, you should see a still image saved to your local storage.
The Kitchen Setup
With the wiring done and the modules connected, I arranged my setup on a kitchen counter. This is the final placement for my project. The main idea of this setup is to have the weighing machine below the camera so that it can capture images of the food.
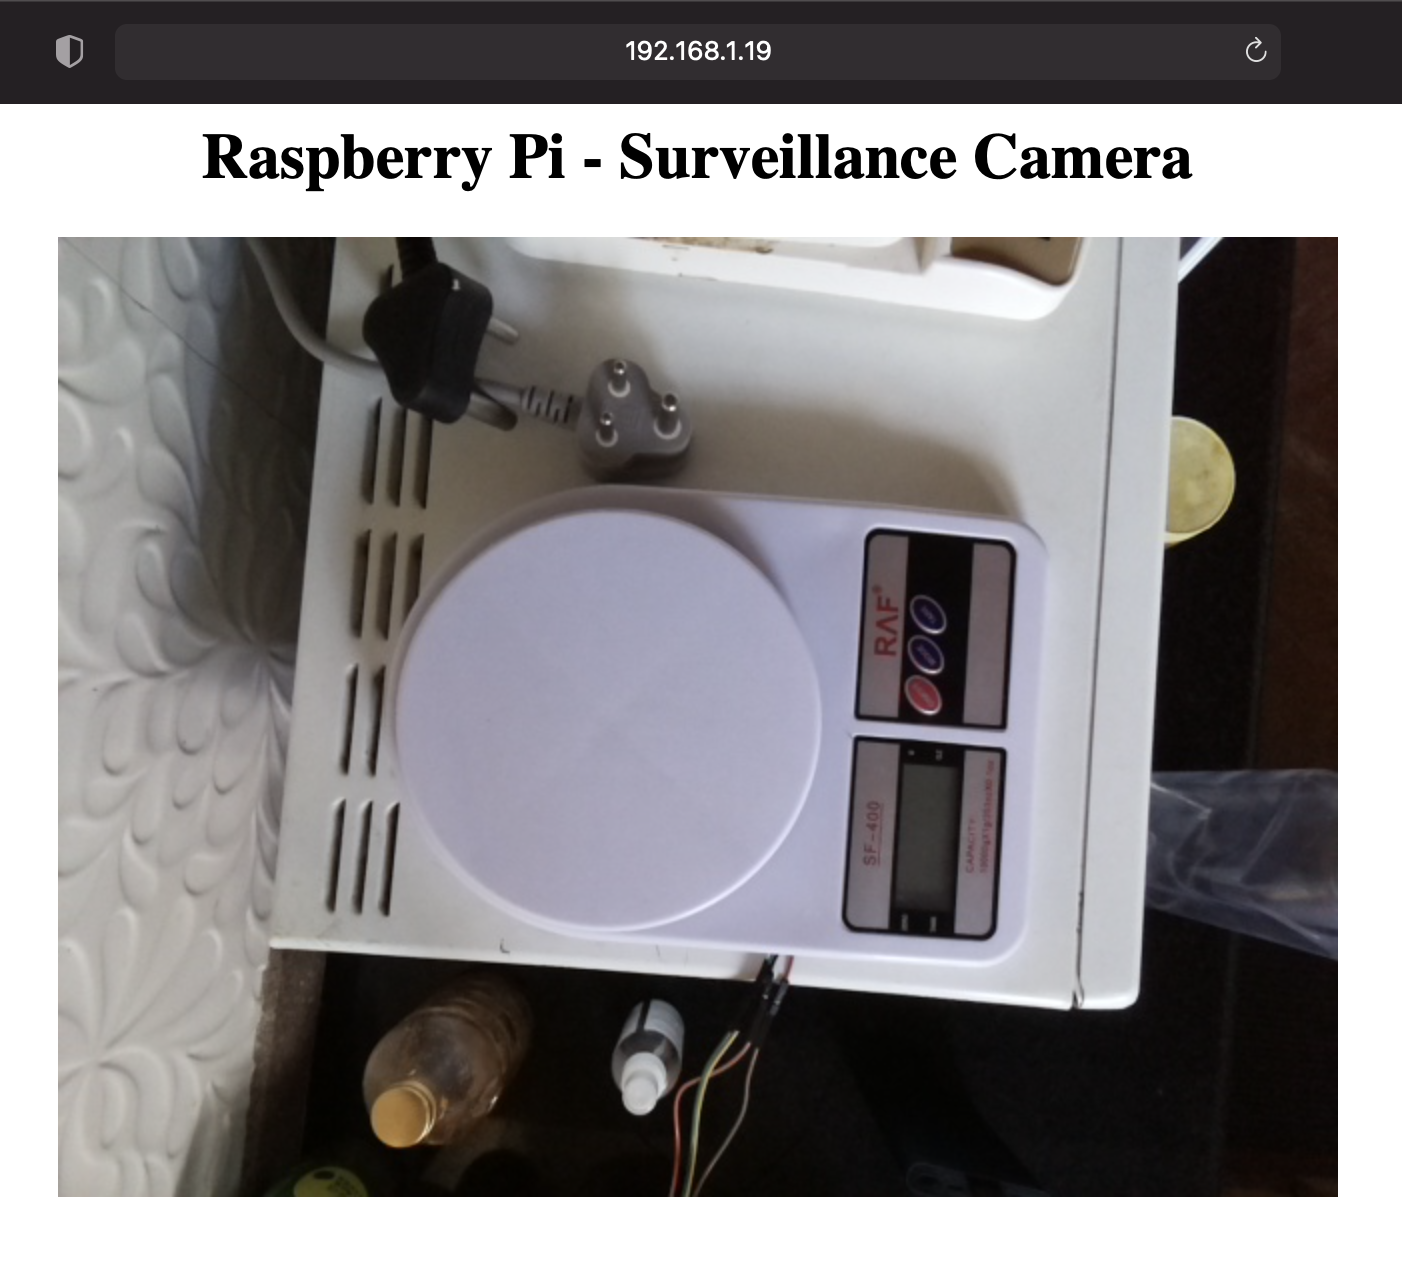
I used a mini webserver to test the video from my camera. You can follow this tutorial to do the same if you wish.
Fetching weight values from the machine
Now that you have set up your camera and weight sensor, we can move on to setting up the weight readings. Login to your pi device via ssh.
Note: You can read how to ssh into or use your raspberry pi by following this tutorial.
Download the hx711.py file to your project. Now create a main.py file and import the HX711 module within it. Add the following code within it.
import RPi.GPIO as GPIO
from hx711 import HX711

referenceUnit = 1 # Calculate based on weight readings
hx = HX711(5, 6) # Ports 5 & 6 to interact with the module
hx.set_reading_format("MSB", "MSB")
hx.set_reference_unit(referenceUnit)
hx.reset()
hx.tare()

while True:
    try:
        value = hx.get_weight() # Read value from sensor
        print(value)

    except (KeyboardInterrupt, SystemExit):
        GPIO.cleanup()
This code basically fetches weight values from your load sensor via the hx711 module and prints them to the console. If everything is set up fine you should see some large values being printed.
We need to calculate a reference unit within our code so that the machine detects the weight accurately. To do this, run the main.py file and add an object to the weight machine. Note the value from the LCD display on the weight machine. Also note the values being printed on the console. You might notice numbers in a certain range i.e 99000 - 99700 depending on the weight of the object. Take a median value from the range i.e 11350 and divide it by the weight of the object in gms. eg. If the weight of the object is 200gms and the values being printed on the console are around 99350, then we shall do 99350 / 200 = 496.75. This will be our reference unit. Replace the existing reference value with 496 and rerun the main.py file. After adding some items to the weight machine you will notice the console prints the correct weight value in gms. You can tweak the reference unit a bit until the values printed are accurate.
Capturing images to the device
Let's add the functionality to click and store pictures whenever something is placed on the scale. The following code will be used to store the pictures in the images directory.
from picamera import PiCamera
import os
import time

IMAGES_FOLDER = 'images'
camera = PiCamera()

if not os.path.exists(IMAGES_FOLDER): os.mkdir(IMAGES_FOLDER)

def capture():
    img_name = int(time.time())
    img_path = f'images/{img_name}.jpg'
    camera.capture(img_path)
    return img_path
In the while loop, add the following code.
while True:
    try:
        value = hx.get_weight()
        print(value)

        while value > 10:
            img_path = capture()
            print(f"{int(value)}gm")

            time.sleep(0.2)
            value = hx.get_weight_A()

    except (KeyboardInterrupt, SystemExit):
        GPIO.cleanup()
This code captures an image whenever the weight sensor detects a weight greater than 10gm. When we run our program and place something on our sensor, you will notice images appear in the images directory.
Creating a classifier
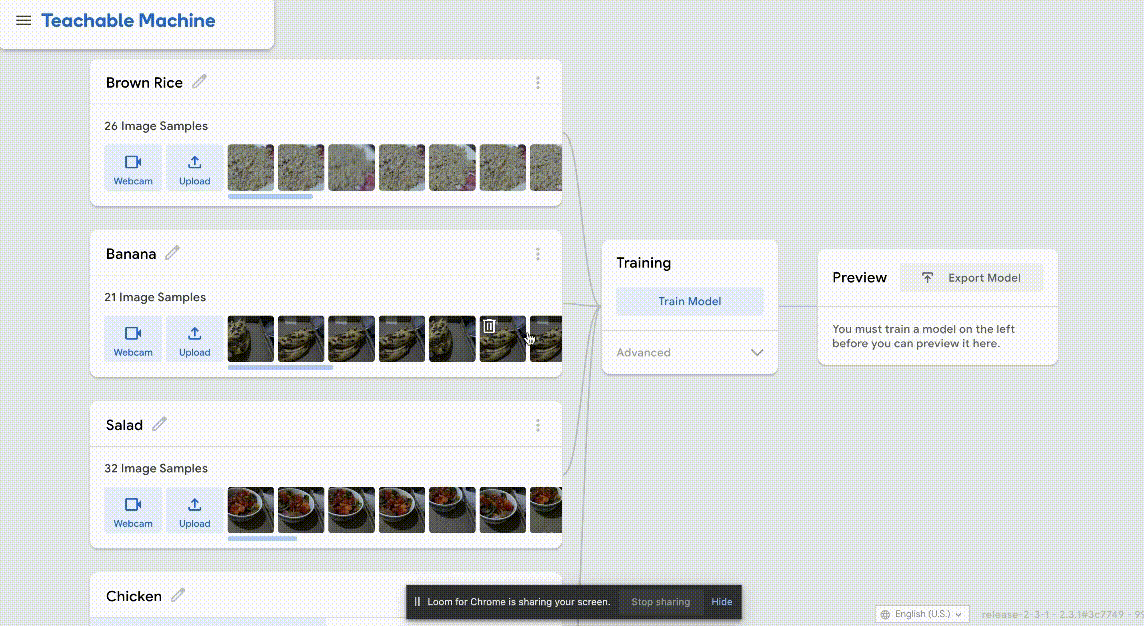
We now collect images for all the items we wish to identify by adding them to the scale for at least 10 seconds. Move your food item around a bit so that the image dataset is a bit diversified. Different sizes, lighting conditions, the quantity goes a long way while training a classifier.

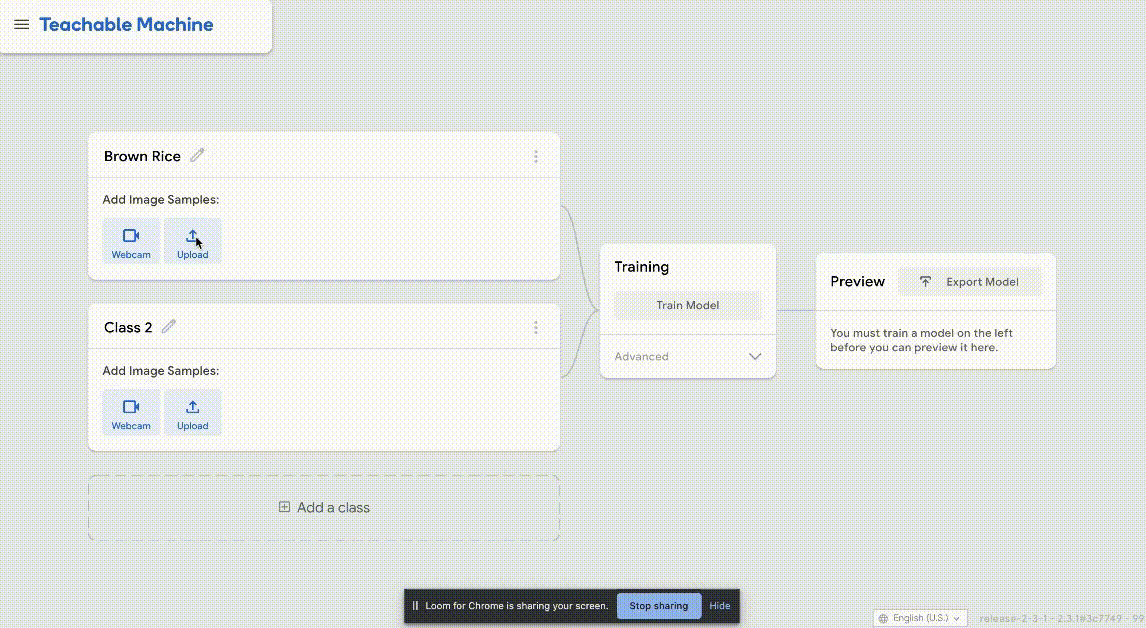
After capturing the images, the next step in our process is to train a classifier to recognize these items. To train this dataset we will avoid using any complex deep learning frameworks or state-of-the-art models. Instead, we can achieve our goal easily by using an online machine learning tool that will train the model within our browser. Head over to Teachable Machine and choose an Image project. Add the images for each class within the UI.
Important: Ensure that you name your food items as close to their names on HealthifyMe app, as these names will be used on the app to search for the items.
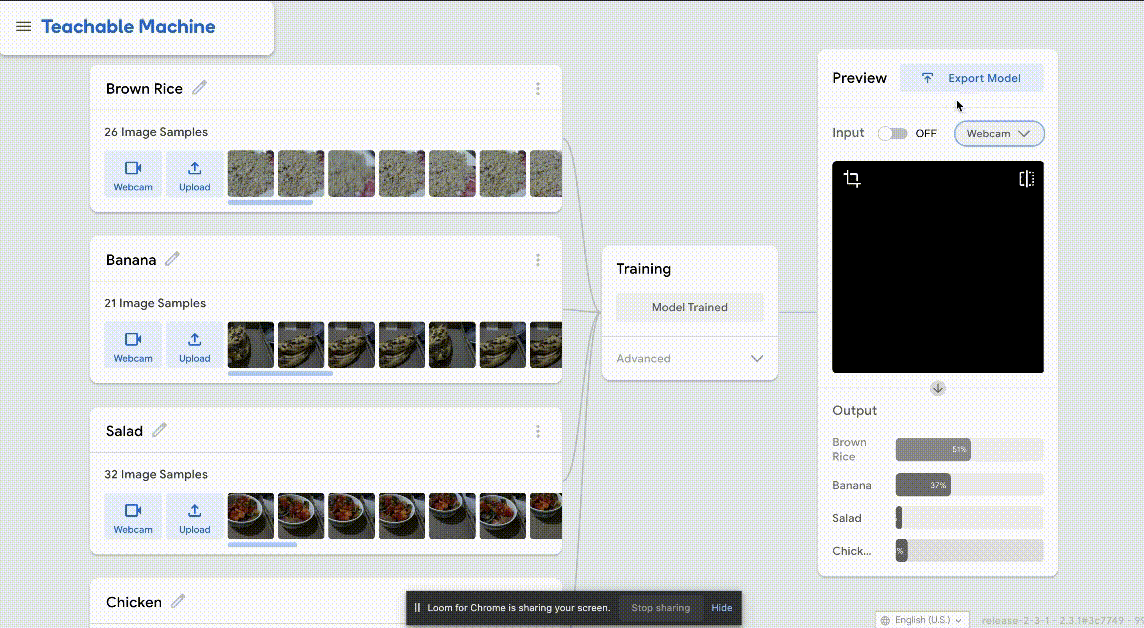
Now click on the Train Model button.
That's it. You now have a trained classifier to detect your foods. Export the model to a Tensorflow lite format (Floating Point). You should now have a converted_tflite.zip file on your system containing labels and model files within.
Extract the archive over to your project folder on the raspberry system. If done right you should have the converted_tflite folder in your hx711py folder.
Setup your project environment with tflite with the instructions mentioned here. Also, make sure you have NumPy and Pillow installed.
pip install numpy pillowDownload the classfier.py file from Github and add it to your project. The Classifier class within will let us import our model and run an inference.
Let's now load our model and try to run classify an image.
from classifier import Classifier

img_path = "images/test.jpg"
classfier = Classifier('converted_tflite/model_unquant.tflite', 'converted_tflite/labels.txt')
label = classfier.infer(img_path)
print(label)
If configured correctly you should have the label of the image printed out. Let's edit the main.py file to accommodate these changes.
Import and initialize the classifier as shown above. Then add the following inference code within the while loop. This code will call the classifier whenever an object is placed on the weighing scale.
while value > 10:
img_path = capture()
label = classifier.infer(img_path)
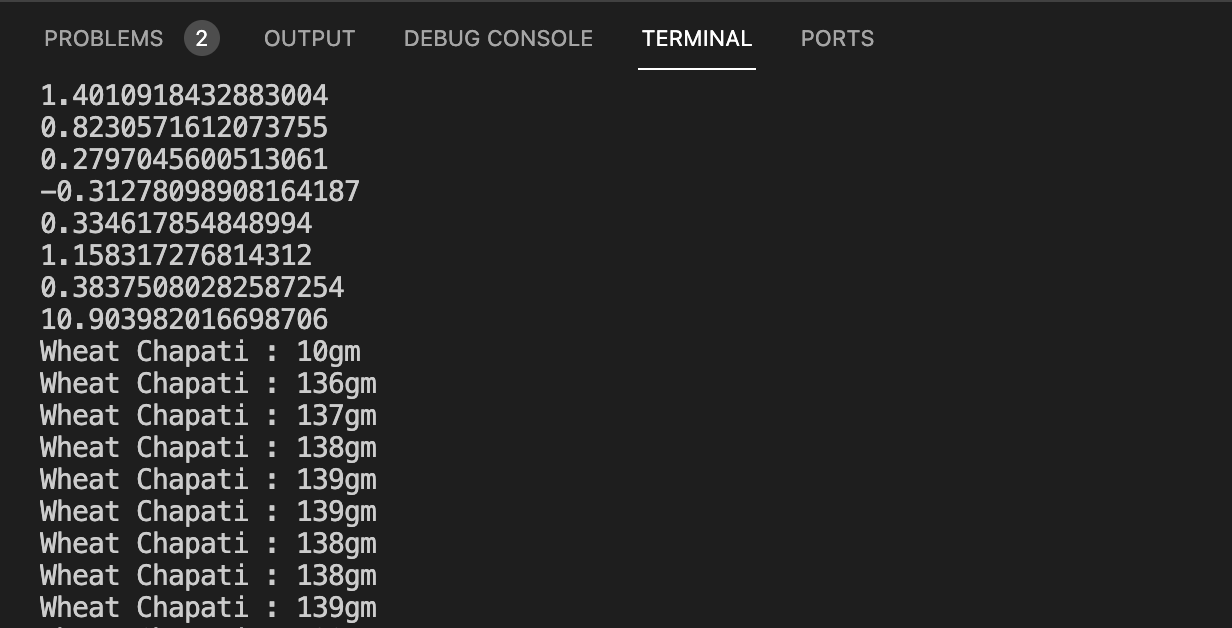
print(f"{label} : {int(value)}gm")
time.sleep(0.2)
value = hx.get_weight_A()Run the main.py file and add an item on the scale. The model should now detect and print the food label on the console.
Logging the items within HealthifyMe
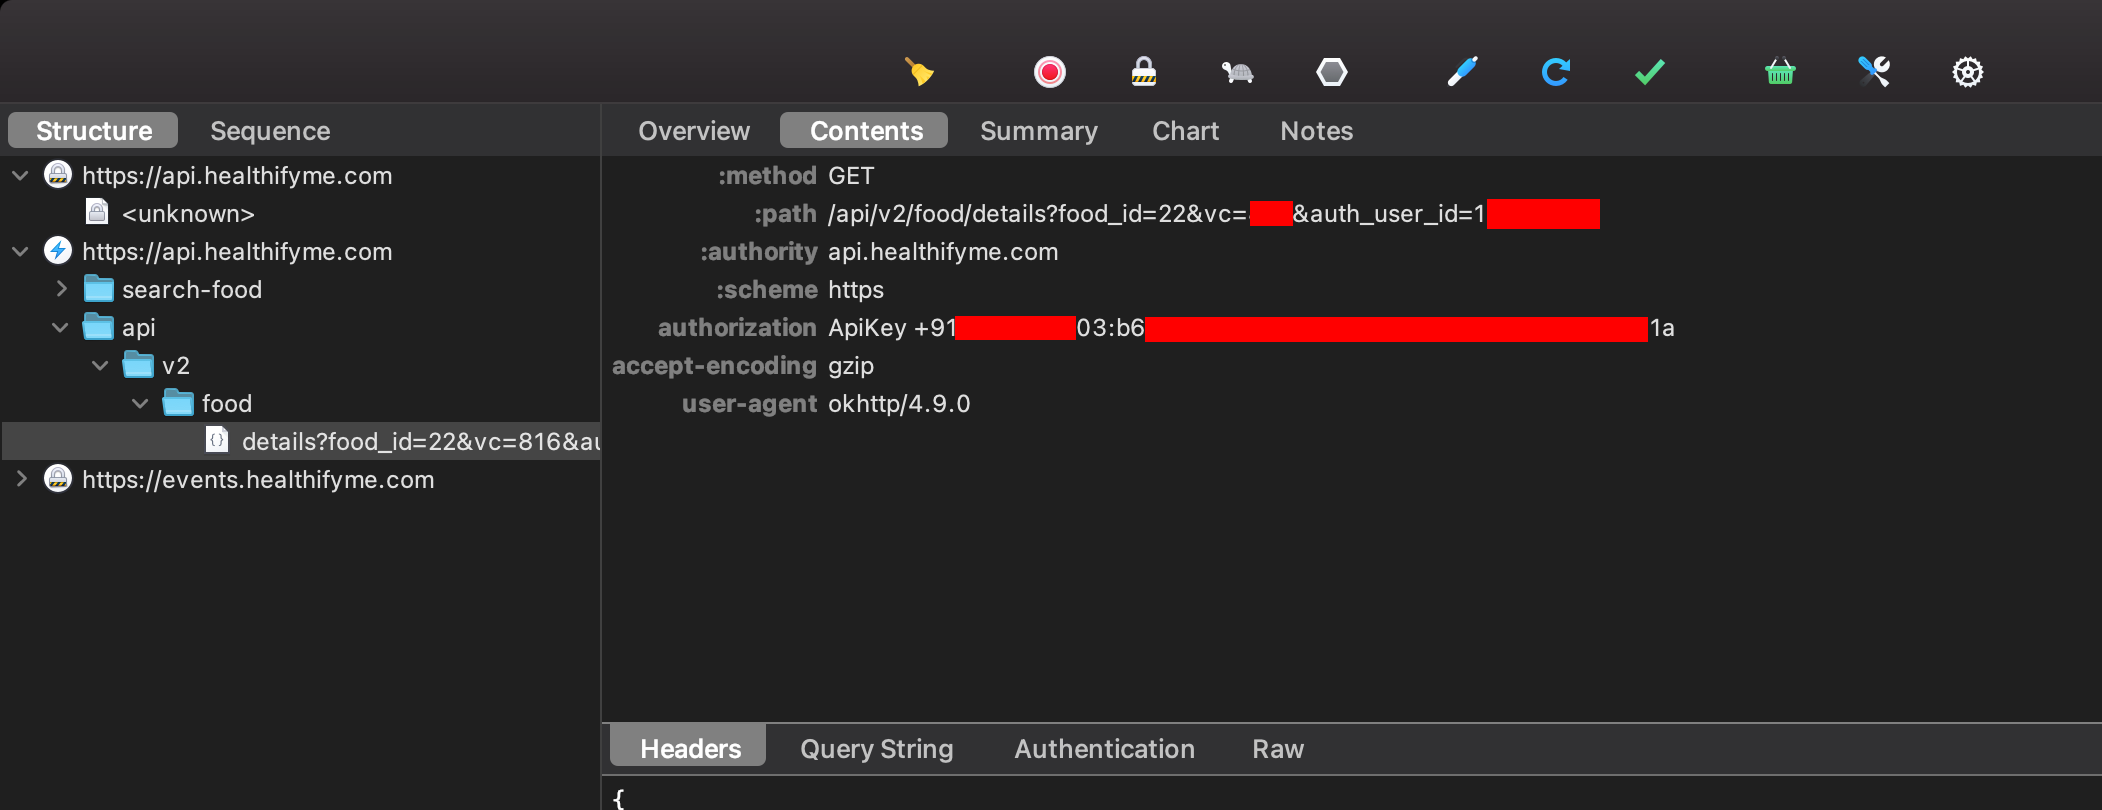
The last step in this process is to enter the food item along with the weight within HealthifyMe. This part is a bit tricky as HealthifyMe does not provide a public API for use. To get around this issue I had to manually monitor my app traffic using Charles proxy and find the right APIs. You can follow my earlier post to do the same.
After you get Charles set up to track your HealthifyMe API, the next step involves getting your credentials from the app, so that our script can make requests on behalf of the app. Log in to your account and make a few requests from the app by opening screens. The requests should appear within Charles. Explore the headers of these requests to find your API key. It should be available within the authorization header. It should start with ApiKey followed by your phone number and will look something like this: ApiKey +91xxxxxxxx03:c2cdaa65c8eab20c8d86f4453f81108ecc111f2. Also, note down the vc and auth_user_id present in the URL parameters.
Next, download the food_logger.py file and add it to your project. The food_logger.py file requires the API key, User ID, and VC that we have retrieved above. We shall pass in these values through environment variables using dotenv package.
pip install python-dotenvOnce the package is installed, create a .env file and add the credentials within it in the following way.
API_KEY=<API KEY>
USER_ID=<USER ID>
VC=<VC>Replace <API KEY>, <USER ID>, and <VC> in the file with the credentials you fetched above.
One thing to note is that HealthifyMe logs the food items within the breakfast/snack/lunch/dinner bracket. I have added a few conditions to automatically pick the right bracket based on the time of the day.
    if 7 <= hour < 11:
        meal_type = 'B'
    elif 12 <= hour < 15:
        meal_type = 'L'
    elif 19 <= hour < 22:
        meal_type = 'D'
Let's import the food_logger module within our main.py and add it to our while loop.
import food_logger

...
...


while True:
    try:
        value = hx.get_weight()
        counter = 0
        print(value)

        while value > 10:
            img_path = capture()
            label = classifier.infer(img_path)
            print(f"{label} : {int(value)}gm")

            counter += 1
            if counter == 3:
                food_logger.log(label, value)

            time.sleep(0.2)
            value = hx.get_weight()

    except (KeyboardInterrupt, SystemExit):
        GPIO.cleanup()
Notice the use of the counter variable added to the loop. The counter is added to ensure that the food is logged is only once i.e on the third inference call of the object.
Test our machine
Our small weighing machine is now ready for a test. Run the main.py file in python. Once the tare is done and the program is ready to receive weights, add an item on the scale.
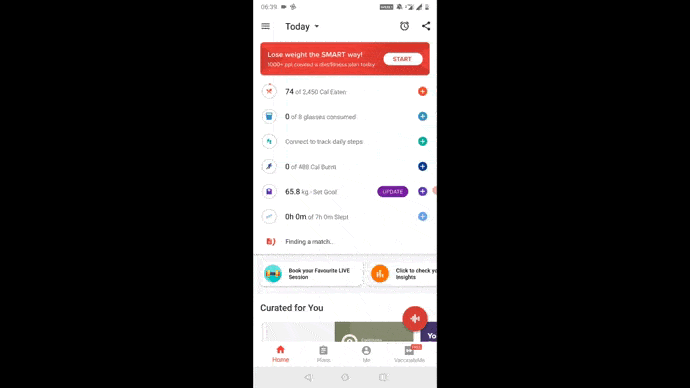
Open the HealthifyMe app and verify if the item has appeared within the Breakfast/Lunch/Dinner section.
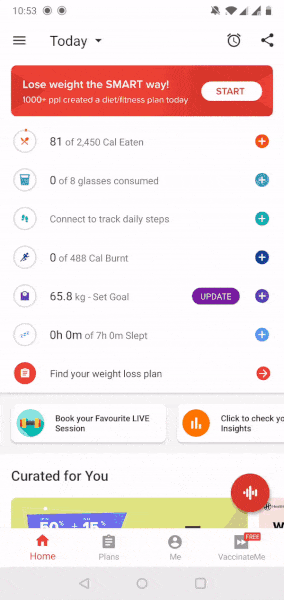
Your calorie weighing machine is now ready. You can run this program as a service so that it automatically starts when the raspberry boots up. This way you easily begin logging your meals on the app when you start the machine.
If you liked this project and wish to read more of such content please do consider following me on Twitter. I frequently delve into the internals of software and journal my learnings on this blog, so make sure you also subscribe to it.
You can find the code for this post on Github.
References
- "Build A Digital Raspberry Pi Scale (With Weight Sensor HX711)". Raspberry Pi Tutorials, 2021, https://tutorials-raspberrypi.com/digital-raspberry-pi-scale-weight-sensor-hx711/. Accessed 30 June 2021.
- "Tatobari/Hx711py". Github, 2021, https://github.com/tatobari/hx711py. Accessed 30 June 2021.
- Digital Kitchen Scale ; How to Disassemble , Repair and Manufacture It ! Part 2. www.youtube.com, https://www.youtube.com/watch?v=u_MJ3uQg4YY. Accessed 30 June 2021.
- “Charles Proxy: Debug Your Android Traffic.” TechTalk, 15 May 2021, https://techtalk.digitalpress.blog/charles-proxy/.
- Teachable Machine. https://teachablemachine.withgoogle.com/. Accessed 30 June 2021.
- Raspistill - Raspberry Pi Documentation. https://www.raspberrypi.org/documentation/usage/camera/raspicam/raspistill.md. Accessed 30 June 2021.
- Projects.Raspberrypi.Org, 2021, https://projects.raspberrypi.org/en/projects/getting-started-with-picamera. Accessed 30 June 2021.
- "Python Quickstart | Tensorflow Lite". Tensorflow, 2021, https://www.tensorflow.org/lite/guide/python. Accessed 30 June 2021.
- How to Setup Python Script Autorun As a Service in Ubuntu 18.04 | Learn Technology With Websofttechs For Free. 28 Feb. 2020, https://websofttechs.com/tutorials/how-to-setup-python-script-autorun-in-ubuntu-18-04/.
